
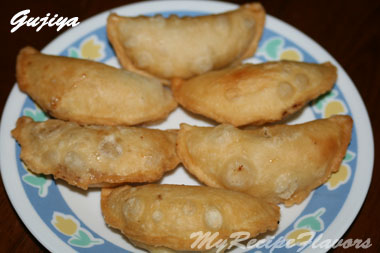
This is a typical Holi snack which my mom always made and I enjoyed it a lot. I only like my mom's gujiyas. The process is very elaborate but the result is very yummy. All my friends still miss my mom's gujiyas on Holi. I too make Gujiya every Holi using her recipe.
Preparation Time: 1 1/2 - 2 hrs
Cooking Time: 30 min
Makes: 15-20 pieces
|
Ingredients: For Dough 3 cups Maida / All Purpose Flour 3 tblsp ghee / oil Salt to taste For Filling 200 gm Khoya 1 cup Sugar 2 tblsp Suji / Rava 2 tsp Khus-khus 1/4 dry cocount, grated 1/2 cup kishmis, Almonds and Cashews 1/2 tsp Elaichii powder 1 tblsp Ghee |
Method:
- Heat 1 tblsp ghee.
- Fry kishmis, cashews, khas-khas and grated coconut separately and keep aside. Ensure that you fry coconut and khas-khas last as it uses up all the ghee. They need to fried for about 2-3 min each.
- Fry suji/rava and khoya separately till golden. Depending on the type of khoya - fry it for about 10-15 min. If it gets too dry then the gujiya filling will be very dry.
- Cool all the above fried ingredients.
- Mix everything together along with sugar and elachii powder. Keep this filling aside.
- Knead the ingredients under For Dough with water to a hard dough.
- Make balls and roll them out. The size depends on what size gujiyas you want.
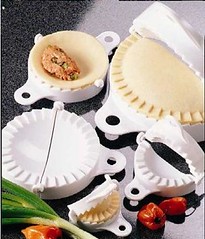
- Now we need to make the gujiyas D-shape and fill it. I always use a gujiya maker that I got from India for this. Here in US, you get a dumpling maker which can be used with equal ease. You can also fold it to a D-Shape using your hand.
- Using a Gujiya/Dumpling maker - Take a puri and place it on the maker. The puri size has to be bigger than the maker round size. Put a spoonful of filling in the center. Dip your finger in water and spread this water all around the edge of the maker. Carefully close the maker ensuring no filling comes in the sealing edge. Press lightly to seal the gujiya. Open the maker and remove the gujiya.
- By hand - Put a spoonful of the filling in the center of the puri. Dip your finger in water and spread this water all around the edge of the puri. Now seal the ends by bringing one half over the other. Press the edge lightly. If you want a designed edge, start from one end folding the edge towards the inside in a spiral form till you reach the other end.
- Heat oil for deep frying gujiyas and deep fry them on medium heat. While you are frying keep the rest of the gujiya's covered so that they don't dry.
Tips
 |
Publishing this again to send it off to Purva's Holi Hai Event
2 comments:
Thank you for the lovely Gujjia entry for the event...
Hope you had a lovely Holi too...
I really loved your recipe thanx for boosting my morale now lwill make it
Post a Comment